5 Effective Craft Ideas You Can Make with Tissue Papers
Tissue paper is one craft material that takes us to the good old days of our childhood. It reminds us of the time when creativity was at its best. It is not too late to show your creative side if you are new to it.
Different colored tissue papers open up endless possibilities to create some distinctive crafts out of the materials readily available at everyone’s home.
So, read on if you are here to get some inspirational ideas and keep your creativity alive.
5 Effective Craft Ideas to Try Now with Tissue Papers
We have gathered some ideas you can use to utilize your free time, decorate your home, give a gift to someone, or bring out the creativity in your child.
So, bring out the stash of tissue papers you have been storing for a long time and make unique crafts with us.
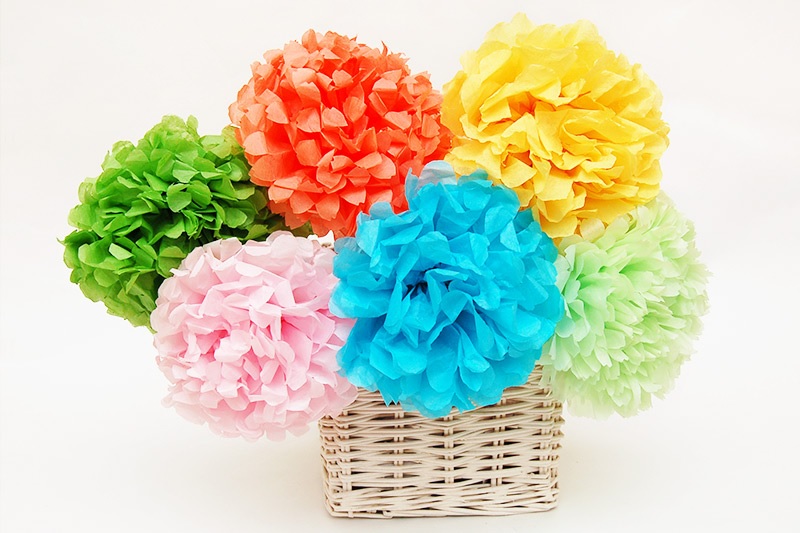
Red Tissue Paper Flowers
Let’s start with the easiest and favorite pattern of all time- flowers.
We are sure everyone must have made flowers with tissue paper at least once, whether to decorate your project or just for fun. Below are the steps to make tissue paper flowers.
Materials Required
- Red Tissue papers
- Scissors
- Pipe Cleaner
- Vase
- Glue/Stapler
- Ruler
Instructions
- Follow the steps mentioned below to make a red tissue paper flower.
- Stack same-size tissue papers on a flat surface.
- Start by folding a 1-inch section, turn it back to fold it again, and repeat the process until you have an accordion.
- Once the tissue paper is folded correctly, staple or glue the layer’s center to secure it in one place
- Trim the end of the tissue paper with scissors so that the edges are round.
- To make a stem, place the pipe cleaner in the middle of the tissue paper.
- Gently separate each layer and unfold the petals to give the shape to the flower.
- Voila! Your red flower is ready.
- These flowers can be used as decorations for any event, including birthdays, weddings, bridal showers, home parties, etc. You can also make a beautiful bouquet to give as a gift to someone.
Tissue Paper Photo Frame
Want to give your room a makeover?
Instead of buying expensive frames from the market, why not make a frame at home and give your room a personal touch?
Materials Required
- A wooden or cardboard frame
- Tissue papers
- Scissors
- Mod Podge
- Paintbrush
Instructions
- Cut tissue papers of different colors into small squares.
- Clear the center of the frame.
- Apply mod podge layer on the frame and stick the squares on it. You can entirely cover the frame or let some original frame show.
- After you are done sticking the square, keep it aside to dry.
- Once it is dry, add a photo in the frame and put it on display or wrap it up to give to someone.
Tissue Paper Coaster
If the presence of a water ring on any piece of furniture frustrates you, this unique craft is for you.
The coasters make a great showpiece and also are very effortless to make. You can instantly elevate the look of your room with these colorful coasters.
Materials Required
- Tissue Papers
- A Coaster
- Mod Podge
- Brush
- Paintbrush
Instructions
- Cut the tissue papers in any shape or size you want.
- Apply a coat of mod podge on the entire coaster.
- Then, slowly start layering tissue papers on top of the coaster.
- Once you are done sticking tissue paper, let it dry completely.
- After that, you must spray clear sealer to make your coaster waterproof.
- And your coaster is ready to use.
Tissue Paper Butterfly
With spring around the corner, this is the perfect time to add a tissue paper butterfly to the hallway of your living room. Because who doesn’t like butterflies?
Materials Required
- Tissue Papers
- Pipe Cleaner
- Scissors
- Pencil
- Thin Wire
Instructions
- Collect or cut same-size tissue papers depending on the size of butterfly you want.
- Now, stack them on top of each other and diagonally fold them in an accordion.
- Take two folded papers and twist a pipe cleaner around the center of the tissue paper.
- After binding it carefully, separate each layer to spread the butterfly’s wings.
- With that step, your tissue paper butterfly is ready.
You can also indulge your kids in these crafty works to spend quality time with them. Get their little hands dirty in the paint to create fantastic artwork.
Tissue Paper Letters
Tissue papers are also useful for creating letters or words for decoration purposes. Whether it is your wedding, birthday, baby shower, bridal shower, etc., you can also use it to create a sign for your bedroom door.
Materials Required
- Tissue Papers
- Cardboard Letters
- Paintbrush
- Pencil/Pen
- Glue
Instructions
- Carve out the letter from the cardboard.
- Cut tissue papers into small rectangular shapes.
- Take a generous amount of glue and spread it on the letter.
- Hold the pen or pencil from the blunt side and slowly fold the tissue paper upwards.
- Apply some glue at the end of the pen and put it on the cardboard.
- Repeat the same process until the entire cardboard is covered with tissue paper.
- And with this, the tissue paper letter is ready to be put on the wall.
Creating letters with tissue paper is an excellent and creative way to help children recognize the alphabet. Such activities keep them engaged for longer and let their creative juices flow.
Wrap Up
We hope you found the above crafts inspiring to make something of your own. There are so many unique crafts you can create with tissue paper.
If you are a mother or a teacher, you can use these crafts to teach your kids and get their creativity flowing. The possibilities are endless; bring your creative side to the table.
So, what is stopping you from being creative? Rekindle your memory now with these crafty ideas.