Step-by-Step Process for BYD Charger Installation

Have you recently bought a BYD electric vehicle and wondered how to get your home charging sorted? Are you looking at your garage wall thinking, “Where on earth do I start with installing a charger?” Or perhaps you’re weighing up whether to tackle the installation yourself or call in the professionals?
You’re not alone in asking these questions. As more Australians make the switch to electric vehicles, particularly BYD models, home charging installation has become a hot topic. The good news is that with the right guidance, getting your BYD charger up and running doesn’t have to be overwhelming.
This guide walks you through everything you need to know about BYD charger installation. From understanding your vehicle’s specific charging requirements to navigating Australian electrical regulations, we’ll cover the lot. You’ll learn about pre-installation planning, the actual step-by-step installation process, costs involved, and even how to tap into government incentives. By the end, you’ll have a clear roadmap for getting your BYD charging at home safely and efficiently.
Understanding BYD Charging Requirements
What Type of Charger Does a BYD Need?
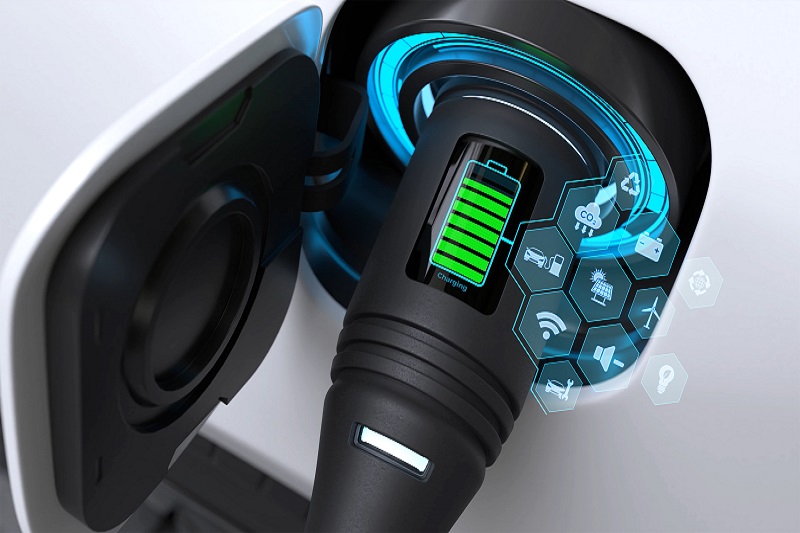
BYD vehicles are quite flexible when it comes to charging options, which is brilliant news for Australian owners. Most BYD models come with a Type 2 connector, the standard across Europe and Australia. This means you’ve got plenty of charging options available.
For home charging, you’ll typically be looking at either a portable charger that plugs into a standard power point or a dedicated wall box charger. The portable option charges at about 2.3kW through a regular 10-amp socket, whilst a proper wall box can deliver anywhere from 7kW on single-phase power up to 22kW on three-phase. Most Aussie homes with single-phase power will max out at 7.4kW, which gives you a full charge overnight for most BYD models.
It’s worth noting that whilst you can use a standard power point, it’s not ideal for regular charging. The sustained load can wear out domestic sockets, and the charging speed is painfully slow. A dedicated charger is definitely the way to go for convenience and safety.
BYD Charging Specifications and Compatibility
Each BYD model has slightly different charging capabilities, so it’s crucial to check your specific vehicle’s manual. The BYD Atto 3, for instance, can handle AC charging up to 7kW, whilst some newer models support faster rates. The key thing to remember is that your car will only charge as fast as its onboard charger allows, regardless of how powerful your wall box is.
The beauty of Type 2 connectors is their universal compatibility. Any Type 2 wall box will work with your BYD, giving you flexibility in choosing brands and features. Some popular options in Australia include the Tesla Wall Connector (yes, it works with BYD!), Zappi, and various models from EVSE suppliers.
When selecting a charger, consider smart features like app control, solar integration, and load management. These can make a real difference to your charging experience and electricity bills, especially with time-of-use tariffs becoming more common.
Pre-Installation Planning
How Much Does It Cost to Install a BYD Charger at Home?
Let’s talk money – because that’s probably one of your biggest concerns. In Australia, you’re looking at anywhere from $1,000 to $3,000 for a complete installation, including the charger unit itself. The wide range depends on several factors that we’ll break down.
A basic 7kW wall box typically costs between $600 and $1,200. Installation labour usually runs from $400 to $800 for a straightforward job near your switchboard. However, if your preferred charging location is far from the switchboard, or you need electrical upgrades, costs can climb quickly. Running cables through walls, upgrading your switchboard, or installing three-phase power can add thousands to the bill.
The good news? Many states offer rebates and incentives. Victoria’s Solar Homes Program, for example, provides rebates up to $1,400 for EV charger installation. Queensland and South Australia have similar schemes. It’s definitely worth checking what’s available in your area before getting quotes.
Choosing the Right Location for Your BYD Charger
Location is everything when it comes to charger installation. You want somewhere convenient for parking, but also practical for the installation itself. Most people opt for their garage or carport, but outdoor installations are perfectly fine with weatherproof units.
Think about your daily routine. Where do you normally park? Can you easily access that spot every day? Is there enough room to comfortably plug and unplug the cable? Consider cable length too – most chargers come with 5-7 metre cables, but you don’t want it stretched tight or creating a trip hazard.
From an installation perspective, the closer to your switchboard, the cheaper the install. Every metre of cable run adds to the cost, especially if it needs to go through walls or underground. Also consider future-proofing – if you might get a second EV down the track, plan for that now.
Electrical Requirements and Home Assessment
Before any installation begins, you need to understand your home’s electrical capacity. Most Australian homes have single-phase power with a 63-amp or 80-amp main switch. This is usually sufficient for a 7kW charger, but it’s worth getting an electrician to assess your specific situation.
They’ll check your switchboard capacity, existing loads, and whether you need any upgrades. Older homes might need switchboard upgrades to accommodate the additional circuit breaker required. If you’re running multiple high-power appliances, load management might be necessary to prevent overloading.
Three-phase power opens up faster charging options but isn’t essential for home use. If you don’t already have it, upgrading to three-phase can cost $3,000-$5,000, so carefully consider whether the faster charging speed justifies the expense.
Can I Install a BYD Charger Myself?
DIY vs Professional Installation: What You Need to Know
Here’s the short answer: in Australia, you cannot legally install a hardwired EV charger yourself unless you’re a licensed electrician. It’s not just about regulations – it’s about safety. EV chargers draw significant power continuously, and improper installation can lead to fires or electrocution.
What you can do is the preparation work. This includes planning the location, running conduits for cables (but not the cables themselves), and mounting brackets. Some keen DIYers do this prep work to reduce labour costs, then have an electrician complete the electrical connections.
Even if you’re handy with tools, consider the complexity involved. EV charger installation requires knowledge of cable sizing, circuit protection, earthing requirements, and testing procedures. One mistake could damage your charger, your car, or worse – put your family at risk.
Australian Electrical Regulations and Safety Standards
Australian Standards are strict when it comes to EV charger installation, and for good reason. AS/NZS 3000 (the Wiring Rules) sets out specific requirements for EV charging equipment. All installations must comply with these standards, plus any state-specific regulations.
Key requirements include dedicated circuit protection, appropriate cable sizing for the continuous load, and proper earthing. RCD (Residual Current Device) protection is mandatory, either built into the charger or installed at the switchboard. The installation must also include isolation switching and clear labelling.
After installation, your electrician must test everything and provide a Certificate of Electrical Safety. This document is crucial – you’ll need it for insurance purposes and if you ever sell your home. Some EV charger manufacturers also require proof of professional installation to honour warranties.
Required Tools and Materials
Essential Equipment for BYD Charger Installation
If you’re planning to do some prep work, you’ll need basic tools like a drill with masonry bits (for brick walls), cable clips, conduit, and mounting brackets. A stud finder helps locate safe mounting points, whilst a level makes sure everything’s straight. Cable pulling equipment makes running conduits easier, especially for longer runs.
For the electrical work, your sparkie will bring specialised tools including cable strippers, crimping tools, multimeters, and insulation testers. They’ll also have the proper torque screwdrivers for terminal connections – these need to be exactly right to prevent hot spots and connection failures.
Don’t forget safety gear. Even for prep work, you’ll want safety glasses, work gloves, and sturdy footwear. If you’re working at height, proper ladders or platforms are essential. It’s not worth risking injury to save a few dollars.
Where to Source Quality Components in Australia
For the charger unit itself, you’ve got several options. Many electricians can supply units as part of the installation package, often at competitive prices. Otherwise, specialist EV suppliers like EVSE, JET Charge, and local electrical wholesalers stock various brands.
Online retailers like EVPowerhouse and Amazon also sell chargers, but be careful about warranty support. Buying from Australian suppliers means easier warranty claims and technical support. Some overseas models might not meet Australian standards or come with the wrong plugs.
For installation materials like cables, conduits, and circuit breakers, your electrician will typically supply these. They’ll know exactly what specifications are needed and have trade accounts for better pricing. If you’re doing prep work, Bunnings stocks basic conduit and mounting hardware.
Step-by-Step Installation Process
Step 1: Switching Off Power and Safety Preparations
Safety comes first – always. The main switch at your switchboard must be turned off before any electrical work begins. Your electrician will use a lock-out tag to prevent anyone accidentally turning it back on. They’ll then test with a multimeter to confirm power is definitely off.
The work area needs preparing too. Clear any obstacles, protect flooring if needed, and ensure good lighting. If drilling through walls, checking for existing cables or pipes is crucial. A good sparkie will use a cable detector to avoid nasty surprises.
This is also when final measurements are taken. The mounting height (typically 1.2 metres to the centre), exact cable routes, and clearances are all confirmed. It’s much easier to adjust plans now than after holes are drilled.
Step 2: Running Electrical Cables
Cable installation is often the most time-consuming part. The cable size depends on the charger’s power rating and the run length. For a 32-amp charger, you’re typically looking at 6mm² cable, but longer runs might need 10mm² to prevent voltage drop.
The cable must be protected throughout its run. This means conduit on external walls, proper cable trays in roof spaces, and appropriate fixings at regular intervals. Cables can’t just be draped loosely or run where they might be damaged.
For underground runs, armoured cable or conduit buried at the correct depth is essential. This protects against accidental damage from garden work and meets regulatory requirements. Corner pulls and inspection points make future maintenance easier.
Step 3: Installing the Circuit Breaker
At the switchboard, a dedicated circuit breaker is installed for your EV charger. This is typically a 32-amp or 40-amp breaker, depending on your charger’s requirements. The breaker must be the correct type – usually Type B or Type C to handle the inrush current when charging starts.
RCD protection is mandatory, providing safety against earth faults. Some installations use combined RCBO units (circuit breaker plus RCD), whilst others have separate components. The choice depends on your switchboard configuration and space available.
Proper labelling is crucial. The circuit must be clearly marked as “EV Charger” or similar, making it easy to identify in future. Your electrician will also check that adding this circuit doesn’t overload your main switch capacity.
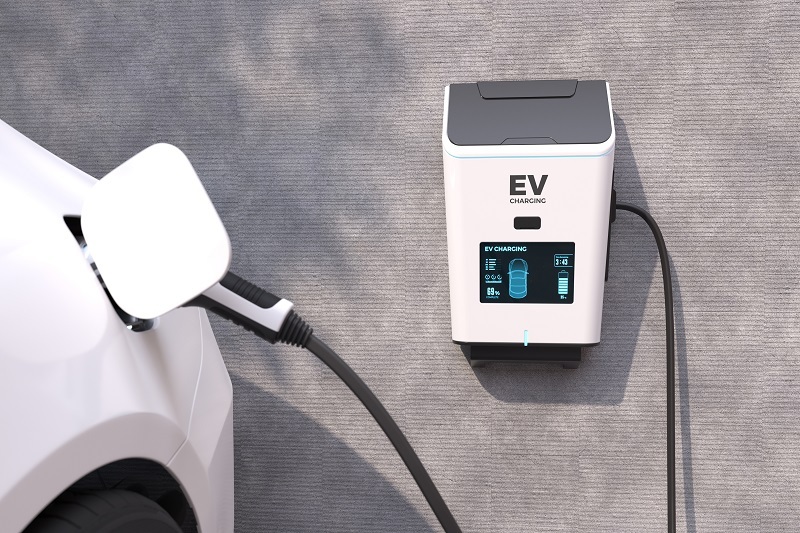
Step 4: Mounting the BYD Charging Unit
With the electrical rough-in complete, it’s time to mount the charger. Most units come with a mounting template to ensure holes are drilled in exactly the right spots. For brick or concrete walls, masonry anchors provide secure fixing. Timber studs need proper screws that won’t pull out under the weight.
The mounting height matters for ease of use. Too high and it’s awkward to plug in; too low and you’re bending down every time. Around 1.2 metres to the centre works well for most people. The unit should be level and firmly secured – it’ll be handled daily.
Cable management is important for a neat installation. Some chargers have built-in cable hooks, whilst others need separate hangers. The cable should be easy to access but not create a trip hazard when stored.
Step 5: Connecting Electrical Components
This is precision work that must be done correctly. Connections that are too loose create resistance and heat; too tight can damage components. Your electrician will follow manufacturer torque specifications exactly. They’ll strip cables to the correct length and ensure no copper is exposed outside terminals.
The earth connection is particularly critical. This provides the safety path for fault currents and must be continuous back to your main earth stake. Some chargers also require a separate data cable for smart features or load management systems.
Once connected, a thorough visual inspection checks everything before power is restored. Are all terminals tight? Is the cabling neat and secure? Are all covers properly fitted? This attention to detail prevents problems down the track.
Step 6: Earthing and Safety Checks
Proper earthing can literally be a lifesaver. Your electrician will test earth continuity from the charger back to the main earth electrode. The resistance must be below specific values – typically less than 0.5 ohms. They’ll also check polarity to ensure active and neutral aren’t reversed.
Insulation resistance testing ensures no breakdown between conductors and earth. This catches any cable damage that might have occurred during installation. RCD testing confirms it trips at the correct current and speed – usually 30 milliamps within 40 milliseconds.
These aren’t optional checks – they’re required by law and for good reason. Your electrician will record all test results on the Certificate of Electrical Safety. Keep this document safe; you might need it for insurance or warranty claims.
Step 7: Testing and Commissioning
With safety checks complete, it’s time for the moment of truth – powering up your new charger. The electrician will energise the circuit and check that the charger initialises correctly. Any error codes or warning lights are investigated immediately.
If your charger has smart features, now’s the time to set them up. This might include connecting to Wi-Fi, setting charging schedules, or configuring solar integration. Some chargers need firmware updates before first use, which can take 20-30 minutes.
The final test is actually charging your BYD. Plug in and confirm charging starts correctly, the car recognises the charger, and the expected charge rate is achieved. Your electrician should stick around for at least the first few minutes to ensure everything’s working perfectly.
How Long Does BYD Charger Installation Take?
Timeline Expectations for Different Installation Types
For a straightforward installation close to your switchboard, you’re typically looking at 2-4 hours. This includes mounting the unit, running a short cable, installing the circuit breaker, and completing all testing. Most sparkies can knock this over in a morning.
More complex installations take longer. If cables need routing through multiple walls or underground, add another 2-3 hours. Switchboard upgrades can add a full day to the job. If you need three-phase power installed, that’s a separate job that might take several days including supply authority approvals.
Planning and approvals add to the timeline too. Getting quotes might take a week, scheduling the work another week. If you need body corporate approval or electrical upgrades, factor in several weeks for the complete process.
Factors That May Extend Installation Time
Older homes often throw up surprises. Asbestos-containing materials require special handling. Outdated wiring might need replacing. Switchboards might be full or non-compliant with current standards. Each issue adds time and cost to the project.
Weather can delay outdoor installations. Your sparkie won’t work in heavy rain for safety reasons. Extreme heat might also cause delays, especially for roof work. Access issues – like narrow driveways or difficult terrain – slow things down too.
Supply chain issues occasionally cause delays. Whilst most chargers are readily available, specific models or smart features might have longer lead times. Booking delays with electricians are common too, especially in areas with high EV uptake.
Common Installation Challenges and Solutions
Dealing with Older Australian Homes
Houses built before the 1980s often present unique challenges. Switchboards might have old ceramic fuses rather than modern circuit breakers. These need complete replacement before adding an EV charger. The main earthing system might also need upgrading to current standards.
Wall construction in older homes can be tricky too. Double brick walls need long masonry bits and careful drilling. Weatherboard homes might have minimal wall cavities for running cables. Sometimes surface-mounted conduit is the only option, though it’s not as neat.
The solution is a thorough pre-installation assessment. A good electrician will identify these issues upfront and quote accordingly. Yes, it might cost more, but it’s better than surprises halfway through the job.
Distance from Switchboard Issues
When your preferred charging location is far from the switchboard, costs escalate quickly. Long cable runs need larger cables to prevent voltage drop. The installation takes longer, uses more materials, and might need creative routing to avoid obstacles.
Surface-mounted conduit is often the cheapest solution but isn’t always aesthetically pleasing. Running cables through walls or underground looks better but costs more. Sometimes it’s worth considering alternative locations closer to the switchboard.
Load management devices offer another solution. These monitor your home’s total power use and reduce charging speed when necessary. This might allow a smaller cable or avoid switchboard upgrades, potentially saving money despite the device cost.
Three-Phase Power Considerations
If you’ve got three-phase power, you can install faster chargers – up to 22kW. But this isn’t always straightforward. Your BYD might only support single-phase charging, making the extra capacity pointless. Even if it does support three-phase, you might not need the extra speed for overnight charging.
Three-phase chargers cost more than single-phase units. The installation is more complex too, requiring four-core cables and appropriate circuit protection. If you don’t already have three-phase, upgrading costs thousands and requires supply authority approval.
The sweet spot for most homes is a 7kW single-phase charger. It provides overnight charging for any BYD model without requiring electrical upgrades. Save three-phase for commercial installations or if you genuinely need rapid charging at home.
Post-Installation Setup
Configuring Your BYD Charger Settings
Once your charger’s installed, spend time setting it up properly. Most modern chargers have companion apps for your smartphone. Download the app, create an account, and connect your charger to Wi-Fi. This unlocks features like charging schedules, energy monitoring, and remote control.
Scheduled charging is particularly valuable. Set your charger to start after 10 pm when electricity rates are often lower. Some smart chargers can even check electricity prices automatically and charge when rates are cheapest. This can save hundreds annually on charging costs.
Don’t forget to set charging limits if your charger supports them. Regularly charging to 80% instead of 100% can extend your battery life. Save 100% charges for when you need maximum range. The app makes this easy to adjust as needed.
Connecting to Smart Home Systems
Many BYD chargers integrate with smart home systems. Whether you use Google Home, Amazon Alexa, or Apple HomeKit, voice control adds convenience. “Hey Google, start charging my car” beats fumbling with apps in the rain.
Solar integration deserves special attention. If you’ve got rooftop solar, chargers like the Zappi can automatically use excess solar generation. This essentially gives you free charging during sunny days. The setup might be complex, but the savings make it worthwhile.
Energy monitoring helps you understand charging costs and patterns. Most apps show daily, weekly, and monthly energy use. Some even calculate costs based on your electricity tariff. This data helps optimise your charging habits and demonstrate savings versus petrol.
Setting Up Scheduled Charging
Time-of-use electricity tariffs make scheduled charging essential. Peak rates might be 40c/kWh, whilst off-peak drops to 20c/kWh. Charging a 60kWh battery at peak rates costs $24; off-peak just $12. Those savings add up quickly.
Most chargers let you set multiple schedules. Perhaps cheap rate charging on weeknights, but immediate charging on weekends when you might need a quick top-up. Some apps even let you override schedules remotely if plans change.
Consider your daily driving needs when setting schedules. If you typically use 20% battery daily, you don’t need eight hours of charging every night. Shorter charging sessions reduce electricity costs and are gentler on your battery.
Do I Need Council Approval for BYD Charger Installation?
Understanding Local Council Requirements
The good news is most councils don’t require specific approval for EV charger installation. It’s generally considered electrical maintenance rather than development. However, there are exceptions you need to know about.
Heritage-listed properties might need approval for external installations. If your charger is visible from the street in a heritage area, council heritage officers might want input on positioning and appearance. Some councils also have specific requirements for installations in flood-prone areas.
The key is checking before installation begins. A quick call to your council’s planning department clarifies any requirements. Your electrician might know local requirements, but ultimately it’s your responsibility as the property owner.
Strata and Body Corporate Considerations
Living in a strata property adds complexity. You’ll definitely need body corporate approval before installing a charger. This usually means submitting a formal application with installation details, electrical reports, and insurance confirmations.
Common property installations need careful planning. Who pays for electricity? How is access controlled? What happens if you move? A by-law might be needed to address these issues. Some strata schemes are developing EV charging policies to streamline approvals.
The trend is towards strata-friendly solutions. Load management systems prevent overloading building infrastructure. User-pays systems ensure you only pay for your electricity. While the process takes longer, most body corporates now understand EV charging is inevitable.
Maintenance and Troubleshooting
Regular Maintenance Schedule
EV chargers are pretty maintenance-free, but some attention keeps them running smoothly. Every few months, check the cable for damage. Look for cuts, crushing, or worn spots. The plug should be clean and free of corrosion. A quick wipe with a dry cloth removes dust and dirt.
Annually, have your electrician check connections inside the charger. Thermal cycling can loosen terminals over time. They’ll also test the RCD and check earthing resistance. This preventive maintenance catches issues before they become failures.
Keep the area around your charger clear. Don’t store chemicals or flammable materials nearby. Ensure ventilation isn’t blocked if your charger has cooling vents. Good housekeeping prevents problems and extends equipment life.
What to Do If Your BYD Charger Stops Working
First, check the obvious. Is there power at the switchboard? Has the circuit breaker tripped? Is your car properly plugged in? Many “faults” are simple user errors. Your charger’s app usually shows error codes that point to the issue.
If the charger won’t start, try the reset procedure in your manual. This often involves turning off power for 30 seconds. Check your car’s charging settings too – some BYDs have charging schedules that might conflict with your charger’s schedule.
For persistent issues, contact your installer first. They know your specific installation and can often diagnose problems over the phone. Avoid DIY repairs – you’ll void warranties and risk safety. Most charger faults need professional attention anyway.
Warranty and Support Information
Most quality chargers come with 3-5 year warranties. Keep your purchase receipt and installation certificate safe – you’ll need them for claims. Warranties typically cover manufacturing defects but not damage from misuse or weather events.
Register your charger with the manufacturer promptly. This ensures you receive firmware updates and recall notices. Some manufacturers offer extended warranties for a fee. Whether that’s worthwhile depends on the base warranty and your risk tolerance.
Local support matters when choosing a charger. Brands with Australian offices provide faster warranty service than overseas suppliers. Check reviews for real-world support experiences. A slightly more expensive charger with good local support often proves better value.
Cost-Saving Tips and Government Incentives
Available Rebates and Incentives in Australia
Government support for EV charging continues evolving. Victoria leads with rebates up to $1,400 for home charger installation. Queensland offers $300 rebates, whilst South Australia provides subsidies through various programs. Even if your state doesn’t have direct rebates, check local council programs.
The federal government’s tax incentives for EVs indirectly support charging infrastructure. Novated lease arrangements can include home charger installation, providing tax savings. Small businesses can claim instant asset write-offs for charger installations.
Timing matters for incentives. Programs often have limited funding that runs out quickly. When new programs announce, act fast. Sign up for state government EV newsletters to hear about new incentives promptly.
How to Reduce Installation Costs
Smart planning significantly reduces costs. Choose a charging location close to your switchboard. Run preparation work like conduits yourself if permitted. Get multiple quotes – prices vary surprisingly between installers.
Consider group installations. Some neighbourhoods coordinate installations, getting bulk discounts. Body corporates installing multiple chargers definitely get better rates. Even two neighbours installing simultaneously might save on call-out fees.
Don’t over-specify your needs. A 7kW charger suits most users perfectly. Fancy features like facial recognition or premium aesthetics add cost without much benefit. Focus on reliability and essential smart features that actually save money.
Energy Tariff Optimisation
Your electricity plan dramatically affects charging costs. Time-of-use tariffs reward off-peak charging. Some retailers offer special EV plans with super-cheap overnight rates. Compare plans annually – the market changes rapidly.
Solar users should understand their feed-in arrangements. Charging from excess solar generation effectively costs nothing. Even partial solar charging reduces costs. Smart chargers that integrate with solar inverters maximise these savings automatically.
Consider controlled load tariffs for dedicated charger circuits. These offer cheap rates in exchange for the utility controlling when power’s available. If you’re flexible about charging times, the savings are substantial.
Enjoying Your New BYD Charging Setup
Setting up home charging for your BYD marks a significant milestone in your EV journey. You’ve navigated the technical requirements, installation process, and regulatory landscape. Now you can enjoy the convenience of starting each day with a full battery.
The installation process might seem daunting initially, but breaking it into steps makes it manageable. Whether you’ve opted for professional installation or tackled some prep work yourself, you’ve added valuable infrastructure to your home. Your BYD charger will serve you reliably for years, saving money and reducing emissions with every charge.
Remember that EV technology keeps advancing. Stay connected with the EV community, keep your charger firmware updated, and watch for new features and opportunities. Your home charging setup is more than just infrastructure – it’s your gateway to sustainable, convenient transport. Welcome to the future of motoring, where every morning starts with a full tank, and the servo is just a distant memory.